영광의 시대!/2022 개발자의 품격 부트캠프 1기
[개발자의품격][부트캠프][1기][31차시] Node.js #6 | static(서버 자원 오픈) | multer(업로드한 파일을 쉽게 관리) | xlsx(엑셀 파일 처리)
DandyNow
2022. 4. 11. 17:26
728x90
반응형
| static
static으로 서버에 있는 자원을 열어 줄 수 있다. 예를 들어 제품 사진을 판매자가 업로드를 했다면 서버의 특정 폴더에 해당 사진을 저장한다. 이때 static으로 열어두면 클라이언트에서 업로드한 이미지를 볼 수 있게 된다.
node 폴더에 public 폴더를 만든 후 public 폴더 아래에 images 폴더를 만든다. images 폴더 내에 nodemon.png 파일을 넣는다. 브라우저에서 "http://localhost:3000/images/nodemon.png"로 접근이 가능해진다.
// 15_static.js
const express = require("express");
const app = express();

// http://localhost:3000/images/nodemon.png
app.use(express.static("public"));

app.listen(3000, () => {
  console.log("서버가 포트 3000번으로 시작되었습니다.");
});
특정 alias를 줄 수도 있다. 아래 코드에는 "/static"을 넣어 주었다.
// 15_static.js
const express = require("express");
const app = express();

// http://localhost:3000/static/images/nodemon.png
app.use("/static", express.static("public"));

app.listen(3000, () => {
  console.log("서버가 포트 3000번으로 시작되었습니다.");
});
| multer
클라이언트에서 업로드한 파일들을 쉽게 관리할 수 있게 해 주는 모듈이다. 다음과 같이 모듈을 설치한다.
npm install multer
node에 업로드 파일이 저장될 "uploads" 폴더를 생성한다.
// 16_multer.js
const express = require("express");
const app = express();
const multer = require("multer"); // multer
const path = require("path"); // multer
require("dotenv").config({ path: `mysql/.env.test` });
const mysql = require("./mysql");
app.use(
express.json({
limit: "50mb", // 최대 50메가
})
); // 클라이언트 요청 body를 json으로 파싱 처리
const storage = multer.diskStorage({
destination: function (req, file, cb) {
cb(null, "uploads"); // 전송된 파일이 저장되는 디렉토리
},
filename: function (req, file, cb) {
// 현재 파일 업로드되는 년월일시분초밀리세컨드+업로드 파일의 확장자
cb(null, new Date().valueOf() + path.extname(file.originalname)); // 시스템 시간으로 파일이름을 변경해서 저장(동일한 파일명이 덮어 쓰는 현상을 예방하기 위함)
},
});
const upload = multer({ storage: storage }); // 위에서 정의한 storage를 사용
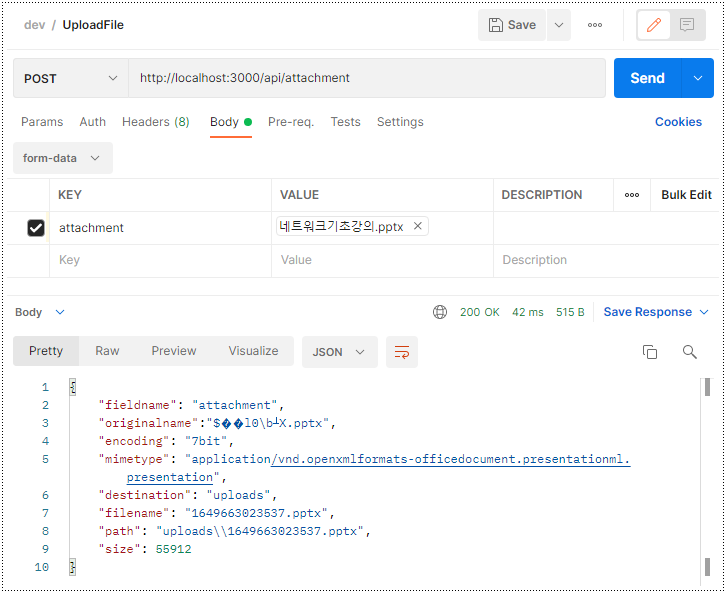
app.post("/api/attachment", upload.single("attachment"), async (req, res) => {
console.log(req.file);
res.send(req.file);
});
app.listen(3000, () => {
console.log("서버가 포트 3000번으로 시작되었습니다.");
});
업로드 파일의 정보를 DB에 업로드하는 코드를 추가하였다.
// 16_multer.js
const express = require("express");
const app = express();
const multer = require("multer");
const path = require("path");
require("dotenv").config({ path: `mysql/.env.test` });
// console.log(process.env);
const mysql = require("./mysql");

app.use(
  express.json({
    limit: "50mb", // 최대 50메가
  })
); // 클라이언트 요청 body를 json으로 파싱 처리

const storage = multer.diskStorage({
  destination: function (req, file, cb) {
    cb(null, "uploads"); // 전송된 파일이 저장되는 디렉토리
  },
  filename: function (req, file, cb) {
    // 현재 파일 업로드되는 년월일시분초밀리세컨드+업로드 파일의 확장자
    cb(null, new Date().valueOf() + path.extname(file.originalname)); // 시스템 시간으로 파일이름을 변경해서 저장(동일한 파일명이 덮어 쓰는 현상을 예방하기 위함)
  },
});

const upload = multer({ storage: storage }); // 위에서 정의한 storage를 사용

app.post("/api/attachment", upload.single("attachment"), async (req, res) => {
  console.log(req.file);
  console.log(req.body);

  // DB에 업로드할 파일 정보
  const fileInfo = {
    product_id: parseInt(req.body.product_id),
    originalname: req.file.originalname,
    mimetype: req.file.mimetype,
    filename: req.file.fieldname,
    path: req.file.path,
  };

  res.send(fileInfo);

  // DB에 파일 정보를 저장 관리하고자 할 때
  // const r = await mysql.query("imageInsert", fileInfo);
  // res.send(r);
});

app.listen(3000, () => {
  console.log("서버가 포트 3000번으로 시작되었습니다.");
});
| xlsx
엑셀 파일을 JSON 파일로 변환하고자 한다. 실무에서는 굉장히 많이 사용하는 기능이다. 다음과 같이 모듈을 설치한다.
npm install xlsx
엑셀 시트를 JSON 파일로 변경한 후 업로드를 위해 위에서 살펴본 muter를 이용한다.
// 17_xlsx_upload.js
const express = require("express");
const app = express();
const xlsx = require("xlsx"); // xlsx
const multer = require("multer");
const path = require("path");
require("dotenv").config({ path: `mysql/.env.test` });
// console.log(process.env);
const mysql = require("./mysql");
app.use(
express.json({
limit: "50mb", // 최대 50메가
})
); // 클라이언트 요청 body를 json으로 파싱 처리
const storage = multer.diskStorage({
destination: function (req, file, cb) {
cb(null, "uploads"); // 전송된 파일이 저장되는 디렉토리
},
filename: function (req, file, cb) {
cb(null, new Date().valueOf() + path.extname(file.originalname)); // 시스템 시간으로 파일이름을 변경해서 저장
},
});
const upload = multer({ storage: storage });
// xlsx 사용 코드
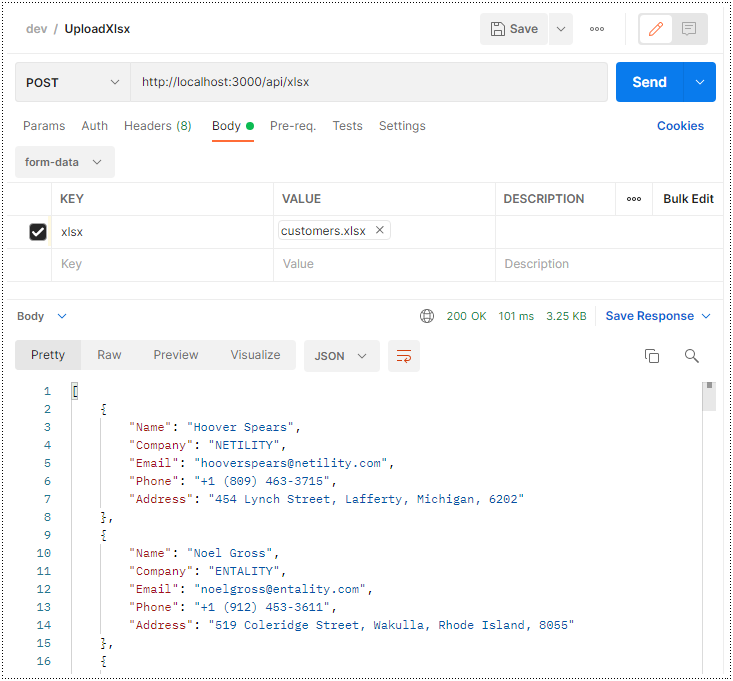
app.post("/api/xlsx", upload.single("xlsx"), async (req, res) => {
console.log(req.file);
console.log(req.body);
const workbook = xlsx.readFile(req.file.path);
const firstSheetName = workbook.SheetNames[0]; // 첫 번째 시트에 데이터가 있다고 가정
const firstSheet = workbook.Sheets[firstSheetName];
const firstSheetJson = xlsx.utils.sheet_to_json(firstSheet); // sheet_to_json은 엑셀 시트를 JSON 으로 변경해 준다.
res.send(firstSheetJson);
});
app.listen(3000, () => {
console.log("서버가 포트 3000번으로 시작되었습니다.");
});
728x90
반응형